After you have glued the spine you will need to add your decorative front and back covers.

Use the same gluing procedure getting out all the air bubbles with the bone folder as before. Then miter your corners. Run your bone folder around the craft board to make a slight indentation. This will help train your paper to fold up and around nice and neat. Go ahead and glue all edges of the front and back covers and smooth as before. Use the tip of the bone folder for a nice neat tuck at the mitered corners.
Now it's time to add the inside covers and inside spine. Just repeat the same process as the front of the mini album.


 Once you have the spine glued then I run my bone folder down the edges and fold each cover back a forth a few times. Now it looks like a real book!
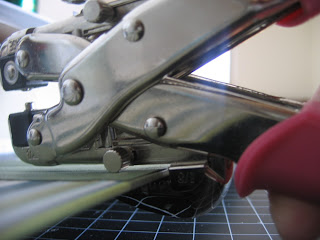
 Punch two holes in the spine so you can attach a ribbon or fiber for the decorative handle. I use my cropadile for this since the crafty board is quite thick.
 It should look like this.
 Add your decorative handle by threading each end from the outside to the inside and tying a square knot. I add fray check to secure the knot.
 I layer all my inside papers together and secure with 2 brads or eyelets. I attached two sequin flowers in the brushed silver brads for this book.
 Now you have the front and back of all these paper sizes to scrapbook on. There's plenty of room for pictures and journaling and any other embellishements you choose to add.
 Enjoy your book!


 I always use book binding glue for my book projects. I really like how easy it is to work with but it also makes the final product look professional. It allows me to make crisp edges and corners. The use of the bone folder helps achieve this look. Please use it, you can't go wrong and you'll never try to make another fold without it :-)
 I first apply the glue on my mat board directly from the bottle. Then I take a brush (foam or bristle) and spread the glue evenly. Make sure you cover every bit of the mat board and spread throughout. It should have a nice amount of coverage but never runny or messy.
 Add your cardstock and smooth out completely with the bone folder. Make sure you are removing any air bubbles if they have formed. In this pic I am doing the spine first.
 Use the same process for the front and back mat board covers. I measure a line on the mat board for reference. I want to leave a small area between the spine and front and back covers so it can be comfortably folded.


